|
TileLogicTM
|
|||||
|
|||||
|
© 2013, White Barn Tech
|
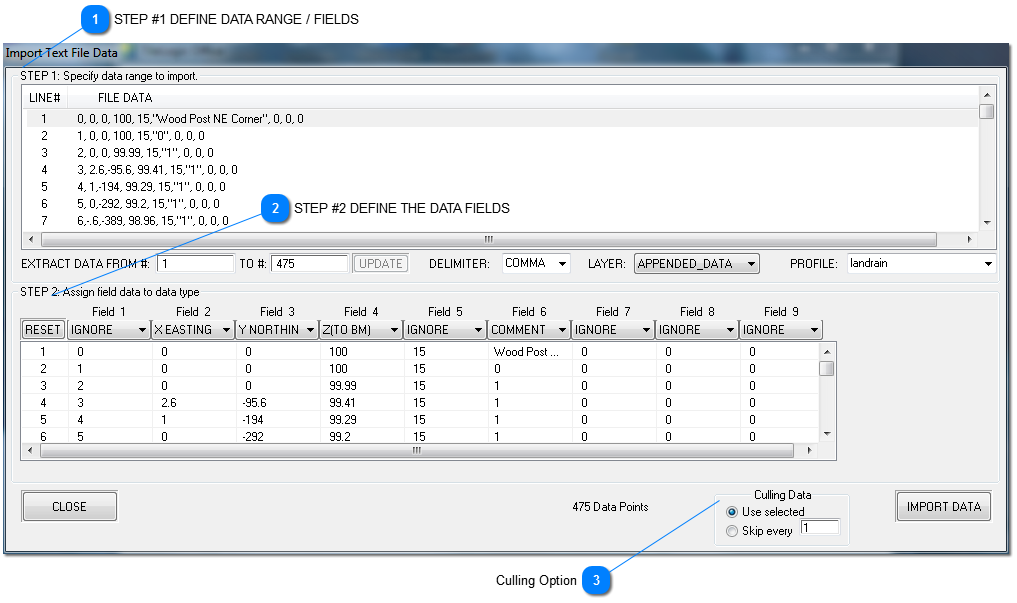
STEP #1 DEFINE DATA RANGE / FIELDS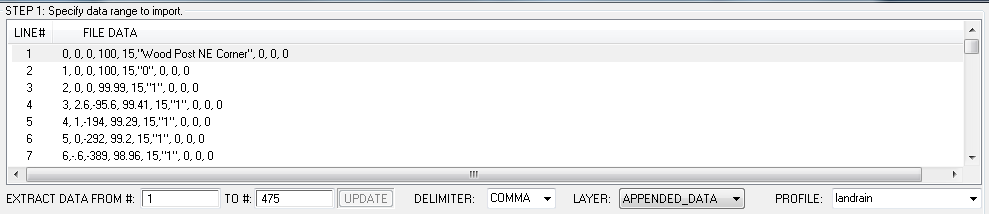
DATA RANGE
The first step in importing / opening text data is to select the data range (lines) to import. By default, once a file candidate has been selected, and the Import Text File Data window opens, the entire range (or all lines) are selected. This can be changed manually or by selecting the data with a mouse. To select with the mouse, select the first line of data by left click, then scroll down to next position desired, and while holding down the shiff key, left click once more. Alternately, you may manually enter the line numbers here:
Here can be seen that lines #1 to #475 have been chosen. If changed, the UPDATE button will be enabled, and you may update the selection with it.
DELIMITERS
Delimiters are "separators" for data fields. Data fields are simply the whole number or text for a give data item. Text is generally identified by being bracketed by double quotation marks ("). Typically, commas are used as delimiters for data fields, but you may also choose from: semicolon, tab, space, or |. Since you are viewing the actually data in the top window, it should be evident what is being used. This allows for a wide range of formats to be read.
LAYER
You must choose a layer to import the layer to. By default, the highest numbered layer (or last) is used. Select the LAYER: dropdown box to choose the layer. When opening a file strictly from text data, the layers available will be those defined in the TLuser.txt file, for use with a new file.
PROFILE (optional)
If you are commonly opeining / importing similiar types of text files, a profile can be saved easily define a type. This allows for remembering your settings for a given format. To define, select from the profile drop down a generic profile like USER DEF2, rename it to whatever you like, and set your preferences. They will be remembered next time, under this profile, when you IMPORT the data. To use a profile that exists, simply select it.
|
Culling Option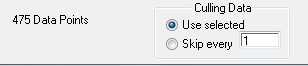
Some programs generate an enourmouse amount of data such as yield monitors or other systems which record data time-based. To alleviate this "data overload", you may specify how many to data records to skip before reading data for use. By default, USE SELECTED is checked and will read in all data that was in the selecte RANGE (see step #1). You may alternately select the number of records to "skip over". Note however, the FIRST data line, in always read, and when opening a file that is text data, is considered the benchmark.
As can be seen in the above example, no records will be skipped, and we will real 475 data pts in doing so.
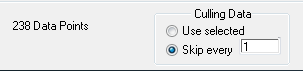
By selecting "Skip every 1" record, we will now read a record, skip a record, and so forth. We now will have approximately half the data point read, from the original data range.
You are free to enter how many points to skip. Some trial and error may be needed to get the best results. A text file may be re-opened and re-read many times, simply discarding previous data. Once you are satisfied with the results, use FILE > SAVE or SAVE AS, to create a TileLogic Office TIA file, which may then be edited as if generated by TileLogic.
| |

