This window is a powerful text file data importer that is highly configurable.
Caution: It is strongly advised that a new layer is created PRIOR to using this feature, and that this new layer is designated as the "import layer". Doing so will allow for trial and error, until you are familiar with this powerful data importer. Appending this data to a new layer, will allow it to be deleted and redone, until satisfied with the results without jeopardizing existing mapping data.
Up to 10 profiles may be saved for different data file formats. To save, select a profile, and type in the name you wish to use. Note that by default, profiles are named "USER DEF X, where X = 1 thru 10.
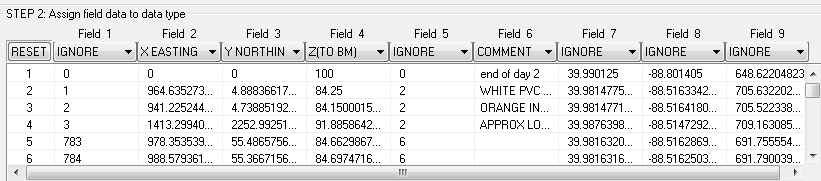
By default, when this window is opened, all data items in the input data are selected for import. This can be changed however, by editing the values in the above boxes OR by clicking on the records in the input file data (for selecting multiple records, left click on the first record, and SHIFT + left click on the last record you choose).
Some programs generate an enourmouse amount of data such as yield monitors or other systems which record data time-based. To alleviate this "data overload", you may specify how many to data records to skip before reading data for use. By default, USE SELECTED is checked and will read in all data that was in the selecte RANGE (see step #1). You may alternately select the number of records to "skip over". Note however, the FIRST data line, in always read, and when opening a file that is text data, is considered the benchmark.
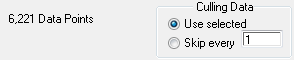
As can be seen in the above example, no records will be skipped, and we will real 475 data pts in doing so.
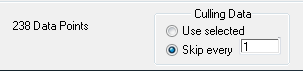
By selecting "Skip every 1" record, we will now read a record, skip a record, and so forth. We now will have approximately half the data point read, from the original data range.
The actual data that will be read, is always shown in the field assignment window (STEP #2). Whenever "CULLING" is updated, so will this window.
You are free to enter how many points to skip. Some trial and error may be needed to get the best results. A text file may be re-opened and re-read many times, simply discarding previous data. Once you are satisfied with the results, use FILE > SAVE or SAVE AS, to create a TileLogic Office TIA file, which may then be edited as if generated by TileLogic.